 By Miles Sinclair
Updated November 2026
A fine dining table setting follows a consistent logic: every piece sits where a guest expects it, in the order they will use it, with enough space to dine comfortably. Once you understand that logic, you can set a formal table for six or sixteen with confidence. This guide walks you through the fine dining table setting from the base layer up, covering the plates, flatware, glassware, linens and finishing touches, along with a checklist and common mistakes to avoid.
Understand the Basic Layout Before You Start
Formal dinners follow a traditional layout that most hosts recognize. The dinner plate sits at the center of each cover, flanked by forks on the left and knives and spoons on the right. Glassware sits above the knife, and bread service sits above the forks. Before you place a single item, measure the space each guest will need. Plan for roughly 24 inches of table width per person. That spacing gives guests room to lift a glass or turn to a neighbor without bumping elbows.
Shopping for one? See our guide: 5 Best Tools for Setting Formal Dining Table Settings in 2026.
If you are still deciding on a table shape, the choice affects how you lay out seats. A round dining table setting needs a different spacing plan than a rectangular one, so pick your table first and then follow the spacing rules for that shape.
Gather Your Tools and Supplies
Gathering everything in one place before you start saves time and prevents the scramble of hunting for a missing salt cellar at the last minute. Use this checklist:
- Charger or service plate (one per guest)
- Dinner plate, salad or first-course plate, and bread plate
- Dinner fork, salad fork, dessert fork (or fish fork if serving fish)
- Dinner knife, butter knife, and soup spoon
- Dessert spoon and dessert fork (placed above the plate or brought with dessert)
- Water goblet, red wine glass, and white wine glass
- Cloth napkins, napkin rings or folds, and a table runner or placemat
- Salt and pepper, a centerpiece, and small service pieces for the meal
Polish all flatware and glassware before the guests arrive. Water spots and fingerprints show up quickly under dining room lighting.
Step-by-Step: Setting the Fine Dining Table
Step 1: Lay Down the Linens
Start with a tablecloth that falls about 12 to 18 inches over the edge of the table on each side, enough to reach the seat but not so long that it pools on the floor. Smooth it out, then add a table runner down the center if you want one. A runner should be about 12 to 16 inches wide and extend the length of the table. Keep runners slightly shorter than the table so the ends remain visible.
Step 2: Place the Charger and Dinner Plate
Set the charger, if you use one, about one inch from the table edge. The charger is a decorative base plate that stays on the table while courses change. Center the dinner plate on the charger. Some formal settings skip the charger, in which case the dinner plate sits directly on the table about one inch from the edge.
Step 3: Position the Flatware
Flatware goes in the order of use, working from the outside in. Place the forks to the left of the plate, with the dinner fork closest to the plate. The salad fork sits to the outside of the dinner fork. On the right side, place the dinner knife closest to the plate with its blade facing the plate. The soup spoon sits to the right of the knife, and the dessert spoon, if you are using one, sits above the plate in a horizontal line. Keep all flatware about one inch from the table edge, and align the bottoms of the pieces evenly.
Step 4: Add the Bread Plate and Butter Knife
The bread plate sits above the forks, slightly to the left. Place the butter knife across the top of the bread plate with the handle pointing to the right. Keep this small plate close to the guest, but leave it clear of the dinner plate.
Step 5: Set the Glassware
Glassware sits above the knife and spoons, angled slightly to the right. Arrange the glasses in the order you will use them, from right to left. A common arrangement places the water goblet first, then the red wine glass, then the white wine glass. Leave about two inches between glasses so they do not crowd each other.
Step 6: Fold and Place the Napkin
Set the napkin on the dinner plate, or place it to the left of the forks. A simple rectangular fold, with the open edges facing the guest, is a safe choice for formal dinners. Napkin rings can add a finishing detail, but they are optional.
Step 7: Add Condiments and Centerpieces
Salt and pepper go within reach of the center of the table, typically between two place settings. Keep the centerpiece low, roughly 12 to 14 inches tall, so guests can see across the table. Tall arrangements block conversation.
Table Spacing and Proportions
Good spacing matters as much as correct placement. Use the following reference points when planning your layout:
| Element | Recommended Distance or Size |
|---|---|
| Seat width per guest | About 24 inches |
| Distance from table edge to plate and flatware | About 1 inch |
| Space between glasses | About 2 inches |
| Tablecloth overhang | 12 to 18 inches on each side |
| Centerpiece height | 12 to 14 inches for conversation |
Adapting the Fine Dining Table Setting for Different Occasions
The core rules stay the same, but you can adjust the details. For a seated multi-course meal, include every fork and spoon listed above. For a more relaxed dinner party, you can drop the fish fork and dessert utensils and bring dessert in on its own plates. If you are hosting a special meal, a Thanksgiving table setting option like an elegant holiday layout works well with the same structure, with seasonal colors added through napkins and centerpieces.
Outdoor events call for some changes. Wind can blow napkins away and tip glassware, so use weights or clips where needed. The White Outdoor Table Setting: A Step-by-Step Guide for Hosts offers useful ideas for keeping a light, formal look while handling the weather.
Common Mistakes to Avoid
- Crowding the table. Guests need room for their plate, glass and elbows. If the table feels tight, add a seat or move to a larger table.
- Placing flatware in the wrong order. Always work from the outside in. Guests rely on this pattern.
- Forgetting the bread plate. It seems minor, but its absence confuses guests during the first course.
- Overcrowding the centerpiece. Tall or heavy displays block eye contact and conversation.
- Mismatched glassware. Keep glass styles consistent for a polished look. Mixing a few pieces is fine, but a full mismatch looks accidental.
- Setting the table too early. Glassware and linens are fine to set a few hours ahead, but keep napkins folded and flatware covered until just before guests sit down to prevent dust or fingerprints.
Tips for a Polished Result
- Set a test place setting first, then copy it around the table for consistency.
- Use a measuring tape to check spacing if you are unsure about seat width.
- Lay out the entire table on paper or a diagram before you start.
- Set a reminder to check the table 30 minutes before guests arrive, straightening any pieces that shifted.
- If you are planning a larger event, you can review a Table Setting for a Buffet guide for ideas on when formal service changes to a buffet format.
Recommended gear
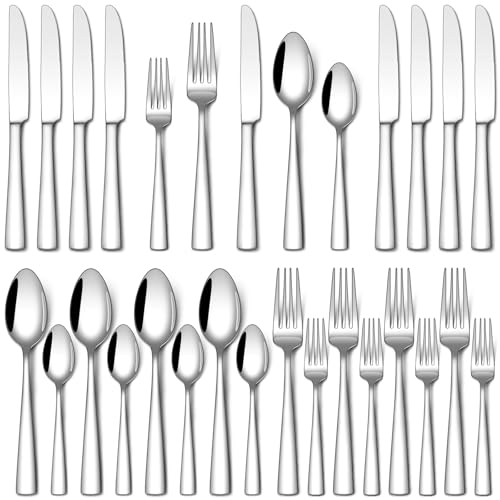
A few supplies make the fine dining table setting easier to execute and to maintain. A set of quality chargers provides a stable base for every cover and keeps the layout visually balanced across the table. A dedicated flatware set with the full range of forks, knives and spoons means you will not need to improvise pieces mid-setup. Cloth napkins in a consistent color help the table look intentional, and a basic table runner or placemat anchors the layout. Look for these items by searching for View on Amazon, View on Amazon, View on Amazon, and View on Amazon.
FAQ
What is the correct order of forks in a fine dining table setting?
Work from the outside in. The first fork you will use, usually the salad fork, sits farthest to the left. The dinner fork sits closest to the plate.
Where does the bread plate go?
The bread plate sits above the forks on the left side, with the butter knife placed across its top edge.
How many glasses should I set for a formal dinner?
Most formal settings include a water goblet and one or two wine glasses. Add a third glass only if you are serving a specific beverage that needs it.
Do I need a charger for every guest?
A charger is optional. It adds a layered look and helps the table feel full before courses are served. If you skip it, place the dinner plate directly on the table.
How far in advance can I set the table?
You can set the linens, plates, flatware and glassware a few hours in advance. Keep napkins folded and cover the table lightly if the room gets dusty. Add final touches, such as candles or fresh flowers, just before guests arrive.
Where should the centerpiece go?
Center the arrangement along the length of the table. Keep it low, roughly 12 to 14 inches, so guests can see each other across the table.
What if my table is round or irregular?
Measure the seat width along the curve of the table edge and space place settings evenly. The core order of items stays the same regardless of shape.
Is a fine dining table setting only for special occasions?
No. The same principles work for everyday formal meals, though you can simplify the number of courses and utensils for smaller gatherings.
Conclusion
A fine dining table setting is built on a few consistent rules: order items by use, leave room for each guest, and keep the centerpiece low. Follow the steps in this guide, check your spacing with a measuring tape, and set a test cover before you start the full table. With practice, the setup takes less time and looks effortless to your guests.
Related reading
- Top 3 Table Settings for Restaurant Picks for Every Dining Room
- Square Dining Table Setting: A Step-by-Step Guide for Hosts
- Round Dining Table Setting: A Step-by-Step Guide for Hosts
- Extendable Dining Table Setting: A Step-by-Step Guide for Hosts
- 6 Best Dining Setting Table and Chairs for Small Spaces and Family Meals (2026)
Ready to choose one?
About Miles Sinclair
Miles Sinclair is part of our editorial team and reviews and edits our holiday hosting guides, checking product details against manufacturer specifications and owner feedback.