 By Miles Sinclair
Updated November 2026
An elegant Thanksgiving table setting comes down to three things: a clear plan, a restrained color palette and a layout that makes it easy for guests to eat and talk. In this guide you will learn how to choose your base layers, arrange flatware and glassware, add seasonal centerpieces and finish with details that feel warm rather than stiff. Most of the work happens before the day, so you can spend Thanksgiving morning enjoying your guests instead of hunting for napkin rings.
Start With a Color Story and a Mood
Elegance on a holiday table usually comes from limiting yourself to two or three colors. Choose a neutral base, such as cream, ivory or warm white, then pick one or two accents. Deep burgundy, olive, dusty blue, copper and antique gold all read as seasonal without shouting. Decide early whether you want a formal, candlelit feel or a relaxed, garden-harvest look. That choice affects everything else, from the weight of your linens to the height of your centerpiece.
Shopping for one? See our guide: 5 Best Placemats for Table Setting: Our Picks Compared.
Pick Your Anchor Pieces First
Before buying or pulling anything from storage, list the items that will define the table: tablecloth or runner, dinner plates, flatware, glassware, napkins and a centerpiece. Everything else supports these. If you are unsure how many runners or placemats you need, our guide to Table Setting Runner and Placemats: 5 Best Sets Compared (2026) walks through sizing and layering options.
Step 1: Measure the Table and Plan the Seating
A table setting looks crowded or sparse depending on how much room each guest has. Plan for at least 24 inches of width per person for a comfortable dinner, and 30 inches if guests will be using both arms or sitting for hours. Measure the table length and divide by your seat count. If your space is tight, Thanksgiving Seating: Table Layouts for Big Groups in Small Spaces offers layout ideas that keep everyone close without feeling cramped.
Step 2: Layer the Base
Start with a tablecloth or runner that drops 8 to 12 inches over each end of the table, or 6 to 10 inches on a round table. Press it well. Wrinkles show more under candlelight than in daylight. If you prefer a layered look, add a runner down the center and placemats underneath each setting. Keep the layers consistent in color so the table reads as one composition.
Step 3: Set the Plates and Charger
A charger plate, the large decorative plate that sits under the dinner plate, adds height and visual weight. It also gives you a place to rest the dinner plate between courses. If you use chargers, place them about one inch from the table edge. Then set the dinner plate in the center of the charger. Salad plates and bread plates go on top or to the upper left. For a deeper look on this, see 6 Best Charger Plates for Table Setting With Charger Plate Ideas (2026).
Standard Placement Reference
| Item | Placement | Notes |
|---|---|---|
| Charger plate | Centered, 1 inch from table edge | Optional but adds height |
| Dinner plate | On top of charger, centered | Remove when the first course is served |
| Salad plate | Above forks, slightly left | Can hold the first course |
| Bread plate | Upper left, above forks | Butter knife rests diagonally across |
| Napkin | Center of plate or left of forks | Folded fan, rectangle or simple roll |
| Glassware | Upper right, above knives | Water glass largest, wine glasses in a line |
Step 4: Arrange the Flatware
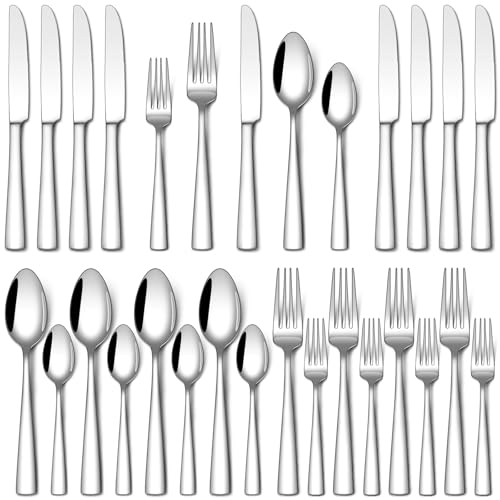
Work from the outside in, following the order of courses. Forks go on the left of the plate, with the salad fork outermost if you are serving salad first. Knives and spoons go on the right, blades facing the plate. The dessert spoon or fork can sit horizontally above the dinner plate, or be brought out with dessert. Keep the flatware about one inch from the plate edge and leave the same spacing between each piece. Consistent spacing is one of the quickest ways to make a table look intentional.
Step 5: Fold and Place the Napkins
Napkins can be simple or sculptural. For elegance, choose linen or cotton in a color that ties to your palette. A classic rectangle folded in thirds and laid to the left of the forks is always appropriate. For a more festive touch, try a fan fold placed in the center of the dinner plate or a single rose fold tucked into a glass. Practice one or two folds before the day, and make sure the napkins are sized correctly for your plates. Our roundup of 6 Best Napkins for Table Setting Options for Holiday Hosts (2026) covers fabrics and sizes worth considering.
Step 6: Build a Centerpiece That Stays Low
The most important rule for a dinner table centerpiece is that guests should be able to see across it. Keep arrangements under 12 inches tall, or go taller and place them off to the side. Good seasonal materials include eucalyptus, dried grasses, seeded eucalyptus, pinecones, small squash, pomegranates and berry sprigs. Add two or three taper candles in matching holders at varying heights. For long tables, repeat the centerpiece at intervals rather than building one massive arrangement.
Tools and Supplies Checklist
- Tablecloth or runner, pressed and measured
- Placemats or charger plates, if using
- Dinner, salad and bread plates
- Flatware set, polished
- Stemware in water and wine sizes
- Cloth napkins, pressed
- Candles, matches or a long lighter
- Floral foam or a water-tight vessel for arrangements
- Small scissors and floral wire
- Place cards and a pen, if assigning seats
Step 7: Add Place Cards and Menu Details
Place cards make a table feel thoughtful and help guests find their seats quickly. Write names in a clear, legible hand, or print on cardstock in a serif font. Set each card above the forks or on the charger. A small printed menu at each setting adds polish, especially for a multi-course meal. Keep these details short: a menu card should fit on a 3 by 5 inch card and list courses, not ingredients.
Step 8: Finish With Light and Small Touches
Lighting does more for an elegant table than any single decorative object. Dim the overhead lights and rely on candles or warm lamps. Keep flames at least 12 inches from flowers and dried materials. Add a few finishing touches, such as sprigs of rosemary tucked into napkin folds, a small dish of nuts or mints, or a carafe of water on the sideboard. Then step back and check the table from a guest’s seat height. That view reveals obstructions and spacing issues you may have missed.
Recommended gear
A steamer or iron keeps linens crisp without the scorch risk of a standard iron on delicate fabrics, which matters when you are pressing large tablecloths the day before. View on Amazon
Taper candle holders in a matched set let you vary height across the table without visual clutter, and they reuse easily from year to year. View on Amazon
A flat, low glass or ceramic centerpiece bowl lets you anchor floral materials without blocking sightlines across the table. View on Amazon
Common mistakes
- Too many colors. Three or four shades is usually the limit before the table looks busy. Pick a palette and stick to it.
- Tall centerpieces that block conversation. Keep most arrangements low, or place taller ones at the ends.
- Skipping the press. Wrinkled linens undercut every other effort. Press the day before and store them flat or hung.
- Crowding the setting. If the table feels tight, reduce the number of pieces per person before reducing guests.
- Forgetting the serving pieces. Gravy boats, bread baskets and serving platters should be placed before guests sit, not during the meal.
- Lighting candles too early. Light them shortly before guests arrive so the wax stays clean and the flames stay steady.
Tips for a Stress-Free Setup
- Set the table the day before, leaving only fresh flowers, candles and napkin folds for the morning.
- Photograph your first complete table layout so you can recreate it accurately if you are doing multiple seatings.
- Keep a spare set of flatware and napkins in a drawer for accidents or extra guests.
- Test your fold on one napkin before committing to all of them.
- If you are short on time, prioritize the base layer, flatware alignment and lighting. These three carry most of the visual weight.
For a broader plan that covers the menu, games and timeline, Thanksgiving Holiday Party Ideas: 12 Easy Themes, Games and Menu Touches pairs well with this table-focused guide. If you are coordinating dishes from several guests, How to Host a Potluck Thanksgiving: Organizing Dishes and Guests explains how to plan around them.
FAQ
How far apart should place settings be at Thanksgiving?
Aim for about 24 inches of table width per guest for a comfortable dinner. If guests will sit for a long meal or need room for serving dishes, go to 30 inches.
Should I use charger plates for an elegant Thanksgiving table?
Chargers are optional but add height and polish. They work especially well with a neutral palette and let you remove dinner plates between courses without leaving the table bare.
How many forks and knives should each place setting have?
For a standard multi-course dinner, most hosts set two forks, one dinner knife, one spoon and a dessert utensil. Simplify to fewer pieces for a casual meal.
What height should a centerpiece be?
Keep arrangements under about 12 inches for a dinner table so guests can see each other. Taller pieces work best at the ends of a long table or on a sideboard.
Can I set the table the day before Thanksgiving?
Yes. Set plates, flatware, glassware and napkins the day before and cover the table lightly. Add fresh flowers, candles and final napkin folds on the day.
Which candles are best for a formal Thanksgiving table?
Unscented taper candles in ivory, cream or deep neutral tones are a safe choice. Keep them at least 12 inches from flowers and dried materials, and trim wicks before lighting.
How do I keep napkin folds from unraveling?
Use a slightly starched or heavier-weight napkin, press the folds firmly, and place each napkin on the plate or chair shortly before guests arrive. Store folded napkins flat if you prepare them ahead.
Conclusion
An elegant Thanksgiving table setting comes from a clear palette, careful spacing and a few well-chosen details. Work through the base layer, plates, flatware, napkins and centerpiece in order, and do as much as you can the day before. Finish with warm light and a final check from a guest’s seat. The result is a table that looks considered and feels welcoming from the first course to dessert.
Ready to choose one?
About Miles Sinclair
Miles Sinclair is part of our editorial team and reviews and edits our holiday hosting guides, checking product details against manufacturer specifications and owner feedback.