 By Miles Sinclair
Updated November 2026
Setting table with silverware correctly means placing forks, knives, and spoons in the order guests will use them, on the correct side of each plate, at a consistent distance from the edge of the table. Once you know the rules, you can set a table for six or sixteen in about ten minutes. This guide walks through the sequence, the measurements, and the small details that make a table look intentional rather than improvised.
Why Silverware Placement Matters for Holiday Hosting
Guests rarely notice perfect silverware placement, but they notice when something feels off. A fork on the wrong side or a knife turned the wrong way slows people down for a moment, and at a crowded holiday table those small pauses add up. Good placement tells guests what courses are coming and in what order, so they can settle in without asking. It also gives the table a balanced, finished look that makes the whole room feel more considered.
Shopping for one? See our guide: 5 Best Tools for Setting Formal Dining Table Settings in 2026.
If you are still deciding where each plate and glass should go, read our overview of Place Setting for Table: A Step-by-Step Guide for Holiday Hosts first. It covers the full place setting, and this article focuses on the flatware portion in detail.
Tools and Supplies You Need Before You Start
Gather everything before you touch the table. Working from a cleared surface with all the pieces within reach prevents the common problem of walking back and forth and leaving gaps.
- A full set of flatware for each guest: dinner fork, dinner knife, dinner spoon, plus salad fork and dessert utensils if your menu calls for them
- A dinner plate and, if used, a salad or bread plate for each seat
- Cloth napkins, folded or rolled, one per guest
- A measuring tape or a ruler for checking distances on a long table
- A soft cloth or lint roller to remove fingerprints from the flatware before guests arrive
- Optional: a small tray to hold extra pieces so you do not overload the table
The Basic Rules for Setting Table with Silverware
Most formal and informal holiday tables follow the same logic. Forks go on the left, knives and spoons go on the right, and everything is arranged from the outside in, following the order of the meal. Knowing these principles lets you adapt to any menu.
- Forks on the left. The dinner fork sits directly left of the plate, tines facing up.
- Knife and spoon on the right. The knife sits directly right of the plate with its blade facing the plate. The spoon sits to the right of the knife.
- Outside-in order. Place utensils for the first course farthest from the plate, and those for later courses closer in.
- Dessert utensils above the plate. A dessert spoon and fork, if used, sit horizontally above the plate, spoon handle pointing right and fork handle pointing left.
- Consistent spacing. Leave about one inch between each piece of flatware, and keep the bottoms of all pieces aligned.
Step-by-Step: Setting the Table with Silverware
Work through these steps in order for each seat. Doing one full place at a time, rather than placing all forks first and then all knives, keeps the spacing consistent.
Step 1: Place the Dinner Plate
Center the dinner plate about one inch from the edge of the table. If you are using a charger, put it down first and set the dinner plate on top. The plate is your anchor point for everything else, so take a moment to align it with the plates on either side.
Step 2: Add the Dinner Fork
Place the dinner fork to the left of the plate, tines facing up. The base of the fork should sit about one inch from the plate’s edge. If you are serving a salad course first, put the salad fork further out on the left, since it is used first.
Step 3: Add the Salad Fork If Needed
When a salad is served before the main course, place the salad fork outside the dinner fork. The rule is simple: the outermost utensil is used first. Keep the salad fork the same distance from the plate as the dinner fork, with tines up.
Step 4: Place the Dinner Knife
Set the dinner knife to the right of the plate, blade facing inward toward the plate. Keep the handle about one inch from the plate’s edge, and make sure the blade is straight rather than angled.
Step 5: Place the Spoons
Set the soup spoon, if you serve soup, to the right of the knife, bowl facing up. If you are serving soup as the first course, the soup spoon goes farthest out. If there is no soup, a single spoon can go to the right of the knife in the same position.
Step 6: Add Dessert Utensils Last
Dessert utensils do not belong on the sides. Place the dessert spoon above the plate with its handle pointing right, and the dessert fork above that with its handle pointing left. This placement signals that these pieces are for the end of the meal.
Step 7: Add the Bread Plate and Butter Knife
If you serve bread, place a small bread plate above the forks on the left. Lay a butter knife across the top of the bread plate, blade facing down and handle pointing right.
Step 8: Place the Napkin
Put the napkin on the dinner plate, or to the left of the forks. Either is correct, but choose one style and use it across the whole table. A napkin on the plate works well for seated dinners, while a napkin to the left suits buffets and casual gatherings.
Silverware Placement Reference Table
Use this table to confirm where each piece belongs, especially when you are working from a menu with several courses.
| Utensil | Position | Orientation | Used For |
|---|---|---|---|
| Salad fork | Far left (if salad is served first) | Tines up | Salad or first course |
| Dinner fork | Left of plate | Tines up | Main course |
| Dinner knife | Right of plate | Blade faces plate | Main course |
| Soup spoon | Far right | Bowl up | Soup |
| Teaspoon | Right of knife | Bowl up | Coffee, dessert |
| Dessert spoon and fork | Above plate | Spoon handle right, fork handle left | Dessert |
Adjusting Silverware Setting for Different Table Styles
The same basic rules apply to every table, but the details shift depending on the size and shape of your table and how many courses you plan to serve.
Round and Square Tables
On round tables, measure from the edge of the table to the plate at each seat, not from the center. Keep the flatware parallel to the table edge closest to each guest. For square tables, align the silverware on each side with the edge it faces, so the arrangement looks even from every seat.
Long Tables
On a long dining table, measure a few spots along the length to confirm that every place is the same distance from the edge. Use a tape measure at the head, middle, and foot of the table. Small errors multiply over a long row of seats.
Buffets and Casual Meals
For buffets, many hosts wrap the forks, knives, and spoons together in napkins and leave them in a basket or caddy at the end of the line. This avoids a crowded table and speeds service. If you are planning the layout of a self-serve spread, our guide to Buffet Table Layout and Traffic Flow explains how to position flatware alongside the food.
Common Mistakes to Avoid
- Mixing up left and right. Forks go left, knives and spoons go right. Double-check the first place before repeating the pattern.
- Setting the knife blade facing outward. The blade always faces the plate.
- Crowding the table. If the flatware for a full menu crowds the plate, serve some courses with pieces brought out later.
- Forgetting dessert utensils. Guests may wonder how to eat dessert if nothing is placed above the plate. Add them unless you plan to serve dessert with a different set.
- Uneven spacing. Place each utensil about one inch apart and keep the bottoms aligned. Gaps that vary from seat to seat look sloppy.
- Skipping the polish. Fingerprints and water spots show under dining room lights. Wipe each piece just before guests sit down.
Tips for a Polished Finish
- Set the table the day before if your serving plan allows, then cover it loosely with a cloth to keep dust off.
- Use a single consistent napkin style throughout the table.
- If you use a tablecloth, make sure it hangs evenly on all sides, which makes placement easier to judge. Our roundup of Best Tablecloths for Parties and Holiday Tables can help you choose a cloth that suits your setup.
- For a themed table, keep the flatware consistent and add color or texture through placemats and napkins instead. Our comparison of 5 Best Placemats for Table Setting: Our Picks Compared covers options for layering.
- Match the number of courses to your flatware. If you serve four courses, set up to four pieces on each side and bring out the rest with each plate.
Recommended gear
These supplies make flatware placement faster and more even, especially for larger gatherings.
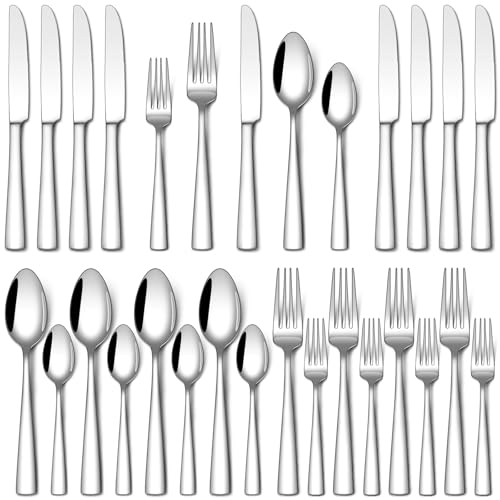
- Stainless steel flatware set with a full place setting count. A complete set in one finish keeps the table visually uniform and avoids mismatched pieces. View on Amazon
- Cloth napkins in a neutral solid color. Solid napkins give you a clean base for any flatware arrangement and make folding easier to repeat. View on Amazon
- Table runner or placemat set. Placemats mark each seat and keep the flatware aligned. View on Amazon
FAQ
Which side does the fork go on when setting table with silverware?
The dinner fork goes on the left side of the plate with tines facing up. Salad forks, if used, go to the far left of the dinner fork.
Where does the knife go in a silverware setting at table?
The knife goes on the right side of the plate with its blade facing the plate. Spoons go to the right of the knife.
Do I need dessert utensils in every table setting?
Dessert utensils are optional. If you serve dessert at the table, place the dessert spoon and fork above the plate. If dessert is served later on a separate plate, you can bring utensils out with it.
How far should silverware be from the edge of the table?
Most hosts place the flatware about one inch from the table edge, and keep the same distance for every seat so the arrangement looks even.
Should the napkin go on the plate or to the left of the forks?
Either placement is correct. Put the napkin on the plate for a formal seated dinner, or to the left of the forks for a more relaxed meal. Use the same style throughout the table.
What is the correct order for silverware on the table?
Arrange utensils from the outside in, following the order of courses. The first utensil used goes farthest from the plate on each side.
Can I set the table silverware the night before?
Yes, for most holiday meals. Set the flatware the day before, then cover the table lightly to keep dust off. Wipe the pieces again before guests arrive.
Do I need a knife for every course?
Only if the meal requires cutting. Many hosts set a dinner knife for the main course and bring out a separate butter knife with bread. Keep the table clear by adding pieces only when they are needed.
Conclusion
Setting table with silverware comes down to a few consistent rules: forks on the left, knives and spoons on the right, and utensils arranged in the order of the meal. Work one place at a time, keep the spacing even, and polish each piece before guests sit down. With these habits, your table will look deliberate and welcoming, and your guests will move through the meal without a second thought about where everything goes.
Related reading
- Vintage Glass Serving Platters: 6 Best Picks for Every Table
- Thanksgiving Seating: Table Layouts for Big Groups in Small Spaces
Ready to choose one?
About Miles Sinclair
Miles Sinclair is part of our editorial team and reviews and edits our holiday hosting guides, checking product details against manufacturer specifications and owner feedback.