 By Miles Sinclair
Updated November 2026
A proper place setting for table use gives every guest a clear, organized spot to eat, with plates, flatware, glasses and napkins arranged in a logical order. Once you know the standard layout, you can set a table for six or sixty in about the same amount of time. This guide walks through the core rules, the variations for casual and formal dinners, and the mistakes that trip up most hosts.
Why a Consistent Place Setting Matters
Guests rarely notice a well-set table, but they notice immediately when something is off. A missing fork, a glass on the wrong side or a napkin hidden under a plate creates small moments of confusion that slow down the meal. A consistent place setting for table seating lets each guest find what they need without asking, and it makes the whole room look intentional.
Consistency also helps you as the host. When every seat is set the same way, you can set the table quickly, check it at a glance, and clear it efficiently after the meal.
Tools and Supplies You Need Before You Start
Gather everything before you touch the table. Setting the table in one pass is faster and produces more even spacing than working one seat at a time while items are scattered around the room.
- Dinner plates, one per guest, plus a charger if you use them
- Salad or appetizer plates, if the menu calls for them
- Bread and butter plates, if serving rolls or bread
- Dinner forks, knives and spoons, plus salad forks and dessert utensils as needed
- Water glasses and wine glasses, matched to the courses
- Napkins, cloth or paper, folded or rolled
- A tape measure or ruler for spacing checks
- A table runner or tablecloth, pressed flat before you begin
Step-by-Step: Building the Place Setting for Table Service
Step 1: Measure and Mark the Seat Spacing
Each seat needs about 24 inches of width along the table edge, which is the standard guideline most etiquette references use for comfortable dining. Measure the table length and divide by 24 to find how many seats fit comfortably. If you are seating eight on a six-foot (72-inch) table, you will be tight, so consider a second table or extension leaf instead of squeezing guests in. Use small pieces of painter’s tape along the edge to mark each seat center if you want precise spacing.
Step 2: Place the Dinner Plate or Charger
Center the dinner plate about one inch from the table edge. If you use a charger, set it first and place the dinner plate on top. The plate should sit roughly in the middle of the seat space, with its rim parallel to the table edge.
Step 3: Set the Flatware in Course Order
Flatware goes on the outside of the plate and is arranged in the order it will be used, working inward:
- Left of the plate: forks, starting with the salad fork (outermost) and then the dinner fork closest to the plate
- Right of the plate: the knife with its blade facing the plate, then spoons, with the soup spoon outermost if soup is served
- Above the plate: the dessert fork and spoon, horizontal, with the spoon handle pointing right and the fork handle pointing left
Keep all flatware about one inch from the table edge and roughly level with the plate’s bottom rim. Fork tines face up, and knife and spoon bowls face up.
Step 4: Add the Bread Plate and Butter Knife
The bread plate sits above the forks, to the left of the dinner plate, about one inch from the top of the dinner plate’s rim. Place the butter knife horizontally across the top of the bread plate, blade facing down, with the handle pointing right.
Step 5: Position the Glassware
Glasses go to the upper right of the place setting, just above the knife. Arrange them left to right in the order you will use them: water glass closest to the knife, then the wine glass to its right, and any additional glass further out. Stagger glasses slightly so they do not form a single straight line. This keeps the table easy to reach across.
Step 6: Fold and Place the Napkin
The napkin can go on the dinner plate, to the left of the forks, or in a glass if you prefer a decorative accent. Simple folds like a rectangle or a fan work well. Rolled napkins can sit in a napkin ring on the plate. Avoid stacking anything on top of a charger so the layered look stays clean.
Step 7: Final Check Across the Table
Walk around the table and compare every seat. Plates should line up in a row, flatware should match in height and angle, and glasses should sit at the same level. Adjust any seat that is noticeably different from its neighbors.
Variations for Casual, Holiday and Formal Meals
The standard layout above works for most dinners, but the number of pieces changes with the menu. Use this table as a quick reference.
| Meal Style | Typical Pieces per Seat | Notes |
|---|---|---|
| Casual family dinner | Dinner plate, dinner fork, knife, spoon, water glass, napkin | Skip the charger and bread plate to keep things simple. |
| Holiday dinner with multiple courses | Charger, salad plate, bread plate, salad fork, dinner fork, knife, soup spoon, glasses | Clear each course before serving the next to keep the setting manageable. |
| Formal dinner | Charger, multiple forks and knives, soup spoon, dessert utensils, full glassware set | Set dessert utensils above the plate, or bring them out with dessert. |
For a buffet or self-serve meal, you can reduce the setting to a plate, a napkin and a single set of flatware rolled or bundled at the end of the line. Plan the flow using ideas from Buffet Table Layout and Traffic Flow.
Adjusting the Place Setting for Your Table Size and Style
Round tables and long rectangular tables use the same basic rules, but spacing changes. On a round table, measure the circumference and divide by the number of guests to find each seat’s arc width. Keep the flatware and glassware placement consistent so guests always know where to look.
Your tablecloth or runner affects how the setting looks. A patterned cloth can make a busy setting seem cluttered, so keep the pieces simple on bold fabrics. If you are choosing a cloth, see Best Tablecloths for Parties and Holiday Tables for ideas that suit different table shapes.
For larger groups, the seating arrangement matters as much as the setting itself. If you are hosting a crowd in a small room, Thanksgiving Seating: Table Layouts for Big Groups in Small Spaces covers layouts that keep every guest comfortable.
Adding Centerpieces and Decor Without Crowding the Setting
Keep centerpieces low enough that guests can see across the table, generally under about 12 inches tall for seated conversation. Leave a clear band of at least a few inches between the centerpiece and the nearest place setting so no one knocks over a glass when reaching for the salt. For decor ideas that fit this approach, see Holiday Party Centerpiece Ideas: 9 Easy Designs for Any Table.
If you are serving coffee or tea after dinner, set up that station separately so the dining table stays clear. Setting Up a Coffee and Tea Station for Guests explains how to do that.
Common Mistakes
- Crowding the seats. Less than 20 inches per seat makes eating awkward. Add a leaf or second table instead.
- Reversing the knife. The blade always faces the plate. Reversing it signals the wrong thing in formal settings and looks off in any setting.
- Placing pieces in the wrong order. Set flatware in course order from the outside in so guests never have to guess.
- Forgetting to match glassware. Mismatched glasses are fine for casual meals, but each guest should have a consistent set.
- Setting too early. Set the table no more than a few hours ahead, and cover it with a clean cloth if guests might arrive early.
- Overloading the table. Too many decorative pieces make the setting hard to use. Keep the setting functional first.
Tips for Faster, Cleaner Table Settings
- Set the table the morning of or the night before, then cover it with a clean sheet or cloth until guests arrive.
- Use painter’s tape or a printed template to mark seat centers on a long table.
- Pre-fold napkins in batches and store them in a drawer until needed.
- Place small items like salt and pepper shakers at least two seats apart so guests share easily.
- If you are short on flatware, set only the pieces for the first two courses and bring out the rest with each new dish.
Recommended Gear
- Matching dinner plate set: A full set in one pattern makes the place setting look uniform and makes it easy to replace a broken piece later. View on Amazon
- Charger plates: A charger adds height and a layered look without requiring extra dishes in the kitchen. View on Amazon
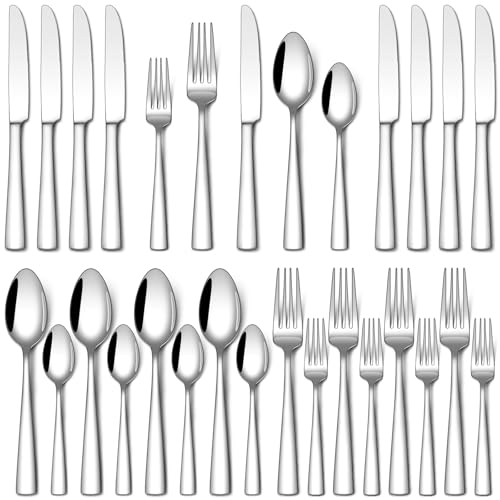
- Stainless flatware set: A five-piece set per guest covers most meal styles and is easy to clean in a dishwasher. View on Amazon
- Cloth napkins: Heavier cotton napkins hold their folds better than thin linen and look polished across a range of styles. View on Amazon
FAQ
How far apart should place settings be on a table?
Plan for about 24 inches of table edge per guest. That width gives each person enough room to use utensils without bumping the neighbors. Tighter spacing works for short meals or buffet-style seating, but it becomes uncomfortable for full dinners.
Which side does the fork go on in a place setting?
Forks go on the left side of the plate. Knives and spoons go on the right, with the knife blade facing the plate. The salad fork or outermost fork sits farthest left, and the dinner fork sits closest to the plate.
Where does the water glass go in a place setting?
The water glass sits above the knife, at the upper right of the plate. Wine glasses go to its right. Keep glasses staggered slightly so they do not form one straight line across the seat.
Should the bread plate go on the left or right?
The bread plate goes on the upper left, above the forks. Place the butter knife across its top edge with the blade pointing down. This is the most common arrangement in both casual and formal place settings.
How far ahead can I set the table?
Setting the table the night before is fine for most dinners. Cover it with a clean cloth or sheet so dust and pet hair do not settle on the pieces. Avoid setting glassware too early if the room is warm, since condensation can leave marks.
Do I need a charger for every place setting?
Chargers are optional. They are most useful for multi-course meals, where they hold the space until the main plate is cleared. For a simple family dinner, you can skip them without affecting the setting.
What is the difference between a casual and a formal place setting?
A formal setting uses more pieces, including multiple forks, knives and spoons, plus a charger and a full glassware set. A casual setting uses only the essentials: a dinner plate, one fork, one knife, one spoon, a water glass and a napkin.
What if I run out of flatware or plates?
Set only the pieces needed for the first course and bring out additional items as each course is served. This keeps the table uncluttered and makes it easy to reset the setting between courses without a full redo.
Conclusion
A reliable place setting for table use comes down to measured spacing, a fixed order for each piece and a final check across the whole table. Once you practice the layout a few times, you can set a full table quickly and with confidence. Use the variations in this guide to adjust for casual or formal meals, and keep decor simple so the setting stays easy to use.
About Miles Sinclair
Miles Sinclair is part of our editorial team and reviews and edits our holiday hosting guides, checking product details against manufacturer specifications and owner feedback.