By Miles Sinclair
Updated November 2026
A table chargers place setting is the layer of plate that sits under your dinner plate, holding the place for the meal that follows. This guide walks you through placing the charger, building the rest of the setting around it, and avoiding the mistakes that make a table look crowded or unfinished. By the end, you will be able to set a table for six or sixteen with confidence and a clear order of operations.
What a Table Chargers Place Setting Is For
A charger, sometimes called a service plate, is a large decorative plate, usually 12 to 14 inches across. It is not meant to be eaten from. Its job is to frame each seat, add color and texture, and signal that the meal is about to begin. Most hosts remove the charger once the first course is served, and the dinner plate or the next course takes its place.
Shopping for one? See our guide: 6 Best Charger Plates for Table Setting With Charger Plate Ideas (2026).
Chargers come in many materials, including glass, metal, wood, woven rattan, and ceramic. Glass and metal chargers work well for formal dinners, while wood and woven styles suit casual holiday tables. Whatever you choose, keep the charger the same size and style at every seat so the table looks balanced.
Gather Your Supplies Before You Start
Setting a table goes faster when everything is within reach. Gather the following before you begin:
- One charger per guest, plus one or two spares for breakage or a last-minute addition
- Dinner plates, salad or bread plates, and soup bowls if serving a multi-course meal
- Flatware, including dinner forks, salad forks, knives and spoons
- Water glasses and wine glasses
- Napkins, napkin rings or folds, and a tablecloth or runner
- A tape measure or ruler and a small notepad for the seating chart
Wipe every charger and plate with a soft cloth before you place it. Fingerprints and dust are far more noticeable on glass and metal than on ceramic.
Step-by-Step: Building the Table Chargers Place Setting
Step 1: Measure the Space Per Guest
Allow about 24 inches of table edge per guest for a comfortable seated dinner. Plates and elbows need room, so cramped tables make even beautiful settings feel awkward. For a rectangular table, a 96-inch table seats roughly eight people on each long side, which means a little under 24 inches per seat at a typical dinner. Measure before you lay out the chargers.
Step 2: Place the Charger Centered on Each Seat
Set each charger about one inch from the table edge, centered in front of the chair. The bottom edge of the charger should line up with where the dinner plate would sit. Keep the spacing even from seat to seat. A gap of about 2 inches between the edges of neighboring chargers gives a clean, uncluttered look.
Step 3: Add the Dinner Plate Last (or Not at All)
If you are serving a first course, place the first course plate or bowl on the charger. When the first course is cleared, the dinner plate can be set on the charger for the main course, and the charger is removed. Some hosts skip the dinner plate and serve the main course directly on the charger, which works well when the charger is ceramic or heat-safe.
Step 4: Set the Flatware in Order of Use
Flatware goes on the outside of the plate, working inward. Forks go on the left, knives and spoons on the right, with the blade of the knife facing the plate. The salad fork sits on the far left, the dinner fork closer to the plate, and the soup spoon or dessert spoon on the far right. The dessert fork or spoon often sits horizontally above the plate, with the handle pointing toward the diner.
Step 5: Place the Glassware and Bread Plate
The water glass sits just above the knife tip, slightly to the right. Wine glasses go to the right of the water glass, in the order they will be used, with the first wine on the far right or closest to the front. The bread plate sits above the forks on the left, with a small butter knife placed across it.
Step 6: Fold and Place the Napkin
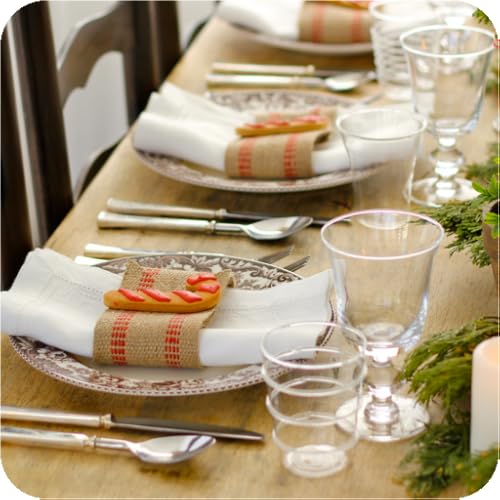
The napkin can go on the dinner plate, on the charger, or to the left of the forks. A simple rectangle fold or a folded triangle keeps the setting neat. Use napkin rings if you want a more festive look, and keep them the same style across all seats.
Layout Reference
| Element | Position | Notes |
|---|---|---|
| Charger | Centered, about 1 inch from table edge | Same size and style at every seat |
| Dinner plate | On top of the charger | Remove when the main course is cleared |
| Forks | Left of the plate | Work outward in order of use |
| Knives and spoons | Right of the plate | Blade faces the plate |
| Water glass | Above the knife tip | Slightly right of center |
| Wine glasses | Right of the water glass | In order of the wines served |
| Bread plate | Above the forks | Butter knife placed across it |
Common Mistakes to Avoid
Most table setting problems come from crowding or inconsistency. Watch for these issues:
- Chargers too close together. Leave room for elbows and for servers to move between seats.
- Mismatched chargers. Mixing styles can look accidental. If you want variety, keep one element consistent, such as the color or the material.
- Flatware in the wrong order. Guests reach from the outside in, so placing forks in the wrong sequence causes confusion mid-meal.
- Forgetting to remove the charger. Leaving the charger in place under the main course can make the table look too full, and some guests will think a course is missing.
- Heavy centerpieces. Tall arrangements block sightlines across the table. Keep them below eye level when guests are seated.
- Skipping the test run. Sit in a chair at the table yourself to check reach and room before guests arrive.
Tips for a Polished Result
- Set the table the day before if you can, and cover it loosely to keep dust off.
- Use a seating chart with place cards for larger groups so people know where to sit.
- Check that chargers are stable on your tablecloth. Some glass chargers slide on satin or silk fabrics.
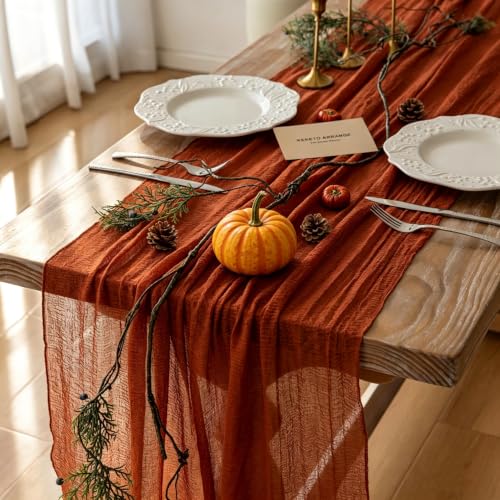
- If you are using a runner instead of a full cloth, make sure the chargers sit fully on the table surface and do not overhang the runner edge.
- Photograph the table once it is set. Seeing it from a camera angle often reveals uneven spacing you missed.
Recommended gear
These tools make the setup faster and the spacing more consistent. Always check the manufacturer’s care instructions, especially for metal and hand-painted pieces.
- Glass charger plates are a common choice for formal tables because they catch candlelight and suit most color schemes. Clear or gold-rimmed styles pair well with white or ivory dinnerware. View on Amazon
- Woven rattan charger plates add natural texture to holiday and casual dinners. Their wide rims help hide small differences in plate size. View on Amazon
- A flexible measuring tape helps you confirm seat spacing and charger placement before guests arrive, especially on round or oversized tables. View on Amazon
- Napkin rings in a matching finish keep the napkin fold secure and tie the setting together across every seat. View on Amazon
For more layouts and ideas, see Table Place Setting Ideas: 7 Layouts for Holiday Hosts (2026) and Proper Table Place Setting: A Step-by-Step Guide for Hosts. If you are setting a table for a holiday meal, Thanksgiving Table Place Setting Ideas: 6 Layouts for Stress-Free Hosting shows how to adapt the layout for a larger crowd. Hosts planning a wedding reception will find useful spacing ideas in Wedding Table Place Setting Ideas: 6 Layouts for Stress-Free Receptions.
FAQ
What size should a charger be?
Most chargers measure 12 to 14 inches across. Choose a size that leaves at least an inch of space between the charger edge and the flatware on each side.
Do I need a charger if I am serving a casual meal?
No. Chargers are optional for casual dinners. They add a formal touch, so skip them if you want a relaxed table, or use simple wood or woven styles for a middle ground.
When should the charger be removed?
Remove the charger once the first course is finished, or just before the main course is served if there is no first course. Your server or helper can clear it along with the first course dishes.
Can I use a charger for a buffet?
Chargers are generally used at seated tables. For a buffet, a charger can serve as a decorative base under a single serving dish, but it is not part of the standard setup for guests who are serving themselves.
How far apart should chargers be placed?
Leave about 24 inches of table edge per guest for comfortable spacing. Chargers themselves should sit about 2 inches apart at minimum so neighbors have room to eat without bumping elbows.
Should the charger match the dinnerware?
It does not have to match, but the two should complement each other. A neutral charger under colorful dinnerware, or a patterned charger under plain white plates, usually works well.
Is there a correct side for the napkin?
Many hosts place the napkin on the dinner plate or to the left of the forks. Either placement is acceptable as long as it is consistent across all seats.
Conclusion
A table chargers place setting works best when every seat is measured, centered, and built in the same order. Start with even spacing, add flatware and glassware from the outside in, and remove the charger when the courses change. With a simple checklist and a test run, you can set a table that looks deliberate and welcoming for any holiday gathering.
Related reading
- Wine Glasses on Table Place Setting: 4 Best Picks for Holiday Hosts (2026)
- Table Setting for a Buffet: 6 Best Place Cards and Warmers (2026)
- Table Place Setting Template: A Step-by-Step Guide for Hosts
Ready to choose one?
About Miles Sinclair
Miles Sinclair is part of our editorial team and reviews and edits our holiday hosting guides, checking product details against manufacturer specifications and owner feedback.