By Miles Sinclair
Updated November 2026
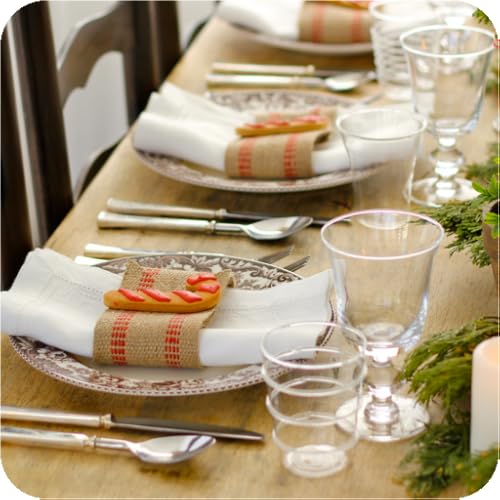
A table place setting template gives you a repeatable layout for every seat at the table, so each guest gets the same plate, utensils and glassware in the same spots. This guide shows you how to build one, measure your space, and adapt it to dinners of any size. Once you have the template, setting the table takes minutes instead of an hour of second-guessing.
Start With the Dinner Menu
Your template should reflect what you are serving, not a generic formal layout. List every course first, then note which items need their own utensil or glass. A roast dinner with soup and dessert needs more pieces than a simple buffet-style meal.
Shopping for one? See our guide: Table Setting for a Buffet: 6 Best Place Cards and Warmers (2026).
Count the courses and write them in order from the outside in. Outer utensils are used first, so the first course sits farthest from the plate.
Build the Core Layout
Draw a circle or rectangle representing one seat, roughly 24 inches wide for a standard dinner setting. Place the following pieces:
- Dinner plate in the center, about 1 inch from the table edge.
- Napkin on the plate or to the left of the forks.
- Forks on the left, with the salad or dinner fork closest to the plate.
- Knife on the right, blade facing the plate.
- Spoon to the right of the knife.
- Bread plate above the forks, with a butter knife across its top.
- Water glass above the knife, with the wine glass to its right.
Measure and Mark Your Spacing
Consistent spacing makes a table look intentional. Allow about 24 inches of width per guest so elbows do not collide. For a rectangular table, mark the center of each seat along the edge using painter’s tape or a folded paper guide before you place any china.
| Piece | Distance from plate edge |
|---|---|
| Forks | About 1 inch |
| Knife and spoon | About 1 inch |
| Bread plate | About 1 inch above forks |
| Glasses | About 1 inch above knife, staggered slightly |
Adjust for Round and Small Tables
Round tables need the same spacing measured along the curve of the edge. On a small table, skip the bread plate and combine the salad and dinner forks to free up room.
Checklist for Setting the Table
- Dinner plates and salad or bread plates
- Dinner forks, salad fork and dessert spoon
- Dinner knives and soup spoons
- Water glasses and wine glasses
- Napkins, napkin rings or folds
- Place cards, if seating is assigned
- Painter’s tape or a paper guide for spacing
Common Mistakes to Avoid
- Placing the knife blade facing outward instead of toward the plate.
- Crowding glasses so they block one another.
- Setting out utensils for courses you are not serving.
- Forgetting the bread plate on the upper left.
- Mismatching dessert utensils, which should sit above the plate.
Recommended Gear
- A cloth table runner or placemat set helps define each seat and protects the table surface. View on Amazon
- Stainless steel flatware in a classic pattern keeps the layout consistent across courses. View on Amazon
- Cloth napkins with rings make folding and placement quick to repeat. View on Amazon
For more layouts, see How to Set a Table Place Setting: A Step-by-Step Guide for Hosts and Formal Table Place Setting Diagram: A Step-by-Step Guide for Hosts. If you want a visual reference alongside your template, Diagram of Table Place Setting: A Step-by-Step Guide for Hosts walks through the same placement.
FAQ
How many inches should each place setting take?
Plan for about 24 inches of table width per guest. This gives everyone room to eat without bumping elbows.
Should the knife face the plate?
Yes. The cutting edge of the dinner knife faces inward toward the plate, which is the standard placement for formal and casual settings alike.
Where do dessert utensils go?
Place the dessert spoon and fork horizontally above the dinner plate, with the spoon handle facing right and the fork handle facing left, or serve them with dessert.
Conclusion
A reusable table place setting template saves time and keeps every seat consistent. Plan your courses, mark your spacing, and check each piece against the list before guests arrive. With a clear layout in hand, you can focus on the conversation instead of the silverware.
Related reading
- Table Place Setting Cards Template: A Step-by-Step Guide for Hosts
- Wine Glasses on Table Place Setting: 4 Best Picks for Holiday Hosts (2026)
Ready to choose one?
About Miles Sinclair
Miles Sinclair is part of our editorial team and reviews and edits our holiday hosting guides, checking product details against manufacturer specifications and owner feedback.