By Miles Sinclair
Updated November 2026
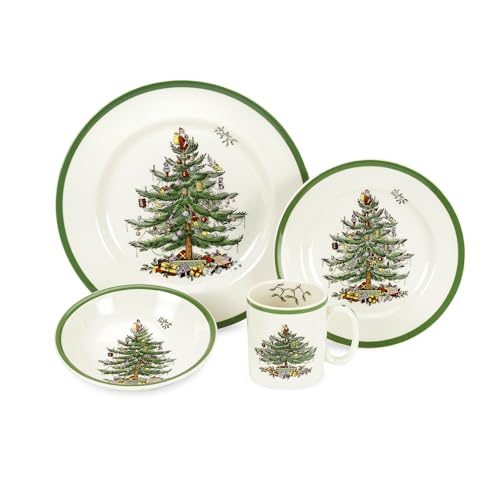
A fine china table setting is the formal way to lay out plates, silverware, glasses and linens so that every guest knows where everything goes and the table looks polished. In this guide you will learn the correct order of placement, how to space pieces so the table feels balanced, and how to handle the extras that come with a multi-course holiday dinner. By the end, you will be able to set a formal table with confidence, even if your china has a delicate pattern or you are working with a mix of inherited and newer pieces.
Why Fine China Calls for Extra Care
Fine china is typically bone china or porcelain with a thin, translucent body and a glazed finish that can be easily chipped or scratched. Because these pieces are often used only a few times a year, they tend to be the focal point of the table. A formal setting also signals that the meal is an occasion, so the layout matters as much as the food. Treat each piece with a light touch, keep stacks shallow, and avoid sliding plates across the tablecloth.
Shopping for one? See our guide: 5 Best Placemats for Table Setting: Our Picks Compared.
Before you start, check the manufacturer’s care instructions for your particular china. Many pieces with gold or platinum trim are labeled dishwasher-safe only on certain settings, while others should be hand-washed. Matching your handling to the pattern protects both the finish and the value of the set.
What You Need Before You Start
Gather everything before you touch the table. Working from a complete inventory prevents the frustrating moment when you realize you are short two salad forks at 5:30 p.m.
- Dinner plates, salad or appetizer plates, and bread plates for each guest
- Dinner forks, salad forks, dinner knives, dessert forks or spoons, and soup spoons
- Water goblet, white wine glass and red wine glass for each guest, plus a champagne flute if you serve a toast
- Cloth napkins, pressed or folded, with a napkin ring or fold for each place
- A tablecloth or runner, ironed and free of wrinkles
- A centerpiece or low floral arrangement that will not block sightlines across the table
- Salt and pepper, butter dish and any sauce or condiment servers
- A tape measure or a sheet of paper marked with a plate-width guide
Step-by-Step: Setting a Fine China Table
Step 1: Plan the Number of Courses and Seats
Decide on the number of courses before you lay anything out. A three-course dinner (appetizer or soup, main course, dessert) needs fewer pieces than a formal seven-course meal. Count your seats and make sure you have enough of every piece, including backups for chipped items. For a comfortable seat, allow about 24 inches of table edge per guest. A round table of 60 inches comfortably seats six to eight people when the setting is kept tidy.
Step 2: Lay Out the Tablecloth and Charger
Spread the tablecloth so the drop is even on all sides, usually 12 to 18 inches over the edge of the table. Smooth it from the center outward. If you are using chargers, place one at each seat, centered and about one inch from the table edge. Chargers are optional in a formal setting but they frame the plates nicely and give the table a finished look.
Step 3: Place the Dinner Plate
Set the dinner plate in the center of each charger or in the middle of the place. The plate should sit about one inch from the table edge, which is roughly the width of a finger. Keep the plate’s rim lined up with the rims of the other plates so the table looks uniform. If you are not using a charger, measure one inch from the edge to avoid placing the plate too close to the lip.
Step 4: Position the Flatware
Flatware goes in the order of use, working from the outside in. The general rule for a formal place is:
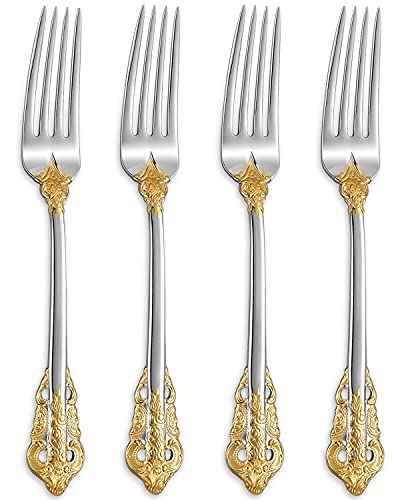
- Left of the plate: forks, starting with the salad fork on the outside, then the dinner fork closest to the plate.
- Right of the plate: knife with the blade facing the plate, then the soup spoon on the outside, then the cocktail or oyster fork if you serve one.
- Above the plate: dessert fork and spoon, placed horizontally with the spoon handle to the right and the fork handle to the left. Some hosts place these with dessert, so check your menu.
Keep the bottoms of all flatware aligned about one inch above the table edge, or in line with the plate’s bottom rim. Space each piece about half an inch apart.
Step 5: Add the Bread Plate and Butter Knife
Place the bread plate above the forks, slightly to the left of the dinner plate’s center line. Put the butter knife horizontally across the top of the bread plate, with the blade facing down. Small butter dishes can sit at the top of the place or be shared along the table.
Step 6: Set the Glassware
Glassware sits above and slightly to the right of the knives. Arrange the goblets in a diagonal line from the largest, the water goblet, nearest the knife, down to the smaller wine glasses. A common arrangement is the water goblet in the back, the red wine glass in front of it and to the right, and the white wine glass to the right of the red. Keep at least one inch between glasses so they do not touch. If you are serving a toast, place a flute at the far right or near the water goblet.
Step 7: Fold and Place the Napkin
The napkin can go on the dinner plate, under the forks on the left, or in a glass. For a formal table, a simple rectangle or a neat square folded in thirds is elegant. Place the napkin with its folded edge facing the guest and the open edge toward the table center. If you are using napkin rings, slip the napkin through the ring and set it on the plate.
Step 8: Add the Finishing Pieces
Place salt and pepper shakers within reach of two or more guests, not directly in front of one person. Position butter dishes at the midpoint of the table. Set out the centerpiece last, after everything else is in place, and check that it stays below eye level so guests can see one another across the table.
Spacing and Balance: A Quick Reference
Use the table below as a reference for measurements when you set the table. Figures are general guidelines; adjust for your plate size and table shape.
| Element | Placement | Typical Spacing |
|---|---|---|
| Dinner plate | Center of place | About 1 inch from table edge |
| Forks | Left of plate | About 1/2 inch apart |
| Knife and spoon | Right of plate | Blade facing plate |
| Bread plate | Above forks, left of center | About 1 inch above forks |
| Glassware | Above and right of knife | At least 1 inch between glasses |
| Dessert utensils | Horizontal above plate | Fork handle left, spoon handle right |
Adjusting for Different Table Shapes and Sizes
Round tables allow more even spacing, but you still need to keep each place’s width consistent. Measure the circumference, divide by the number of guests, and mark each place with a small tag or chalk line. Rectangular tables are more forgiving for courses, but keep the centerpiece low so that guests on opposite sides can talk comfortably. For a long table, consider placing two smaller arrangements instead of one large one.
If space is tight, you can drop the charger and bread plate. Many guests will be fine with a dinner plate, forks, knives, a single soup spoon and glassware. Keep the dessert utensils at the top of the place or bring them out with dessert.
Common Mistakes to Avoid
- Crowding the place. More than four or five pieces per side makes the table look cluttered. Use the dessert pieces only if the menu calls for them.
- Forgetting the bread plate. Guests will hold bread on their dinner plate, which can clash with the main course. A small bread plate solves this.
- Mixing up the knife and spoon. The knife blade faces the plate, and the spoon sits to the right of the knife. Check each place before guests arrive.
- Setting glasses too close. Glasses that touch can chip or tip over during the meal. Leave space between each one.
- Skipping the test run. Lay out one full place, sit in a chair, and reach for each piece. You will catch awkward placements before they become a problem.
- Stacking fine china. Stacks put pressure on the glaze. Use felt liners between plates or store them standing upright in a cabinet.
Tips for a Smooth Setting
- Set the table the day before whenever possible, then cover it lightly with a sheet to keep off dust.
- Place name cards after the table is set, so you can adjust seating without moving the china.
- Wash and dry fine china by hand if the pattern has metallic trim. Dishwasher detergent can dull gold and platinum.
- Keep a small tray nearby for used flatware so you can clear a place quickly between courses.
- Check the official care instructions for your china pattern, and call the manufacturer if you have questions about a specific piece.
Recommended gear
A few supplies make a formal setting easier to maintain. Pick up felt plate protectors if you store your china in stacks, and use a sturdy tablecloth so the plates sit level.
- Felt plate protectors: These sit between plates in storage and reduce the chance of chips and scratches on the glaze. View on Amazon
- Charger plates: Chargers frame each place and help you keep spacing consistent across a formal table. View on Amazon
- Linen tablecloth: A pressed linen cloth drapes evenly and makes a fine china setting look intentional. View on Amazon
- Cloth napkins with rings: Napkin rings keep folds neat and add a finished touch to each place. View on Amazon
If you are still working out the basic rules of formal placement, it may help to review related layouts first. Our guide on Fine Dining Table Setting: A Step-by-Step Guide for Hosts covers the standard sequence of courses in more depth, and Where Should Napkins Be Placed in a Table Setting? A Host's Guide answers a common question about napkin placement. For a more casual variation, see White and Gold Table Setting: A Step-by-Step Guide for Hosts, which shows how metallic accents can work with formal pieces.
FAQ
Do I need a charger for a fine china table setting?
No. Chargers are optional. They add a decorative base and help frame the dinner plate, but a formal table works without them as long as the dinner plate is centered and spaced about one inch from the table edge.
Which side does the knife go on?
The knife goes on the right side of the dinner plate, with the blade facing the plate. The soup spoon sits to the right of the knife.
Where do the water and wine glasses go?
Glassware sits above and slightly to the right of the knife. The water goblet is usually the largest and sits closest to the knife, with the red and white wine glasses placed to its right in a diagonal line.
How many forks should be on the left?
A formal setting usually has two forks on the left: a salad fork on the outside and a dinner fork next to the plate. If you serve an oyster or cocktail course, that fork goes on the far right.
Should dessert utensils be on the table from the start?
Many hosts place dessert utensils horizontally above the dinner plate, with the spoon handle pointing right and the fork handle pointing left. If you prefer a cleaner look, bring them out with the dessert course instead.
How far in advance can I set a fine china table?
You can set the table a day ahead, provided you cover it with a sheet or cloth to keep dust off. Place name cards and centerpieces on the day of the meal so they stay fresh.
How should I store fine china between uses?
Store pieces standing upright when possible, or stack them with felt liners between plates. Keep stacks low and avoid heavy items on top. For specific care, check the manufacturer’s instructions, and consult the maker directly if you have a question about a particular pattern or finish.
What if I only have a few pieces of matching china?
Match the dinner plates and glassware first, since they are the most visible pieces. Mix in matching bread plates or serving pieces only if the pattern and finish coordinate well. A neutral tablecloth and simple napkins can help unify a set that is not complete.
Conclusion
A fine china table setting is built from a few simple rules: plates centered and evenly spaced, flatware in the order of use, glassware arranged in a clean diagonal, and finishing pieces placed where guests can reach them. Plan your courses, gather your pieces, and set the table a day early so you can test the layout. With these steps, your formal dinner will look polished and feel welcoming from the first guest’s arrival.
Ready to choose one?
About Miles Sinclair
Miles Sinclair is part of our editorial team and reviews and edits our holiday hosting guides, checking product details against manufacturer specifications and owner feedback.