By Miles Sinclair
Updated November 2026
A well-planned christmas buffet table setting lets guests help themselves without bottlenecks, keeps hot food hot and cold food cold, and still looks like a holiday centerpiece. In this guide you will plan the footprint, arrange the food in a logical order, layer height and color, and set up plates, utensils and warmers so the line moves quickly. Most of the work happens two or three days before the party, which leaves the day itself for finishing touches.
Step 1: Plan the Layout and Traffic Flow
Before you place a single dish, decide where the buffet will live and how guests will move past it. A buffet works best when it is set against a wall or in a room corner, so guests approach from one open side. If you have a long table, plan for guests to line up on both sides only when the table is at least 8 feet long. For a small space, a single-sided line is easier to manage.
Shopping for one? See our guide: 7 Best Christmas Buffet Table Setting Ideas for Holiday Hosts (2026).
Measure the table and mark the zones on paper or in a notes app. Most hosts find that three zones work well: plates and utensils at the start, mains and sides in the middle, and desserts and drinks at the end. Keep beverages separate from the food line if you can, so guests are not crowding the serving area with cups.
Tips for Measuring Your Space
- Allow at least 30 inches of clear floor in front of the table for each person who will be standing in line.
- Leave 18 to 24 inches between serving dishes so guests can reach without reaching over another dish.
- Keep the path to the buffet clear of cords, chairs and gift bags.
Step 2: Choose a Tablecloth, Runner and Base Layer
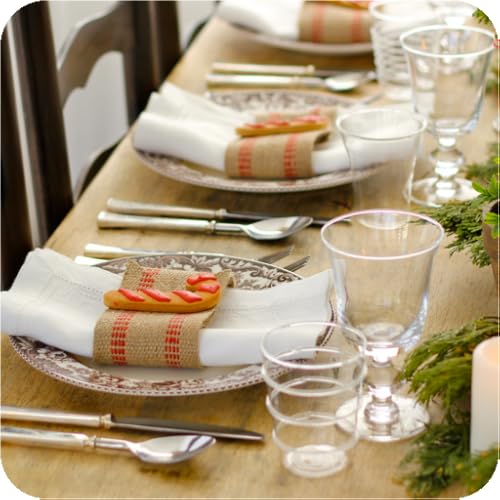
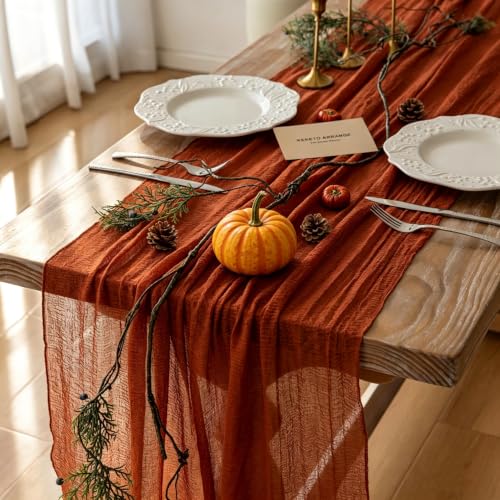
Start with a full-length cloth that falls to the floor on all sides. A cloth that stops at table height looks unfinished once guests begin reaching across. Many hosts layer a plain white or cream cloth under a red, green or metallic runner, which gives you a festive focal line without covering the entire table in pattern.
If you plan to use chafing dishes or electric warmers, check that the cloth will not sit too close to the heat source. Use a small mat or a heat-resistant trivet under any hot element, even when the manufacturer says the surface is safe. Consult the warmer manufacturer’s instructions for clearance requirements before you place any cloth or decor near the heat.
Step 3: Build Height and Visual Interest
A flat buffet looks crowded and is harder to scan. Build three levels of height: low items (bowls and platters), medium items (taller dishes or risers), and tall items (a centerpiece or a stand for a ham or turkey). Aim for a mix of heights rather than a single tall stack, so every dish is visible from the line.
Useful Risers and Stands
- Wooden crates or sturdy boxes covered with cloth, for a rustic look.
- Cake stands and pedestal plates for desserts and bread.
- Small books or stacked cutting boards under a platter to lift it a few inches.
Keep the tallest element near the back of the table or at the center of the line, never at the front where it blocks sight lines to the rest of the food.
Step 4: Order the Food Logically
Guests should be able to take a plate and move in one direction without doubling back. The most common order is plates, then salads and cold sides, then hot sides, then mains, then bread and condiments, then desserts. Some hosts place the main protein near the start so that guests take a serving before the line gets long; others place it in the middle to spread the traffic. Either works if the flow is clear.
Put utensils on the same side as the serving spoon for each dish, and angle the handles toward the guest. Place napkins and cutlery either at the very start of the line, or at the end, but never mid-line where they will get knocked into food.
| Zone | Items | Placement Tip |
|---|---|---|
| Start | Stacked plates, napkins, flatware | Place plates at the very front so guests can grab them first. |
| Cold sides | Salads, relishes, cheese boards | Keep cold dishes on ice or near a cool area of the table. |
| Hot sides | Potatoes, green beans, stuffing | Use warmers or chafing dishes with a clear fuel or heat setting. |
| Mains | Turkey, ham, roast, vegetarian entrée | Place the carving station near the middle, with a board and knife ready. |
| Bread and sauces | Rolls, gravy, cranberry sauce | Put sauces beside the dish they go with, not in a separate cluster. |
| End | Desserts, coffee, drinks | Move dessert to a separate table if the line is long. |
Step 5: Set Up Plates, Flatware and Napkins
Stack dinner plates in small piles of 10 or 12 at the start of the line, with a clean edge facing guests. Fold napkins into a simple square or roll them and place them in a basket or a small holder beside the plates. Lay out flatware in a separate caddy or wrap each set in a napkin, depending on how much counter space you have.
If you are serving a warm main with a hot gravy, set a small spoon or ladle on the rest so it does not drip onto the cloth. Keep a damp towel or box of tissues at the end of the line for quick cleanup.
Step 6: Add Warmers, Chafers and Cold Storage
Hot food should be kept at 135°F or higher, and cold food at 41°F or lower, according to standard food safety guidance from the USDA. Use chafing dishes with fuel or electric warming trays for hot items, and set cold dishes in bowls of ice or on a chilled tray. Check each heating device before the party so you are not troubleshooting while guests are waiting.
For food safety questions about temperatures, storage times or reheating, consult the USDA or your local extension service, or a food safety professional.
Step 7: Finish With Decor and Lighting
Once the food is in place, add the finishing layer. Scatter a few evergreen sprigs, pinecones or dried orange slices along the runner, but keep them away from the food and warmers. Use battery-operated candles or string lights rather than open flame, especially near a buffet where guests will be reaching in.
If you want a placecard or menu marker, put it beside each dish at the front of the line, not on the food itself. A small card on a stand works well and helps guests identify dishes with dietary notes.
Common Mistakes
- Crowding the line. Leave room for guests to stand and hold a plate in front of each dish. If the line bends, add a second serving station.
- Placing hot and cold dishes side by side with no separation. Heat from a warmer can spoil a cold dish nearby, so leave a gap.
- Forgetting serving utensils. Set one spoon or tong for every dish before guests arrive.
- Using a cloth that ends at table height. It looks unfinished once guests begin leaning on the table.
- Setting the buffet too close to a doorway. Guests will block traffic and the line will spill into the hall.
- Leaving decor too close to heat. Evergreen and paper décor can scorch or catch fire near warmers.
Tips for a Smoother Christmas Buffet
- Make a printed or handwritten map of the table layout and tape it inside a kitchen cabinet so anyone helping you knows where each dish goes.
- Set up the buffet the night before, minus fresh garnishes and anything that needs refrigeration.
- Label dishes with the name and any allergens, and keep a list of ingredients for guests with dietary restrictions.
- Plan a second table or side station for drinks and desserts so the main line stays moving.
- Have a designated person to refill dishes and clear used plates, so you can enjoy the party.
Recommended gear
These items help with the warming, serving and traffic-flow parts of a buffet. Choose what fits your number of guests and the amount of table space you have.
- Stainless steel chafing dish set is useful when you want hot mains and sides to stay warm for an hour or more without reheating in the kitchen. View on Amazon
- Electric buffet food warmer tray gives you a steady heat source without fuel, which suits indoor parties where open flame is not allowed. View on Amazon
- Tiered serving stand set lets you build height on a long table, which makes dishes easier to see from the line. View on Amazon
- Flatware caddy with napkin holder keeps plates, utensils and napkins in one place at the start of the line. View on Amazon
FAQ
How far in advance can I set up a Christmas buffet table?
You can set the tablecloth, runner, risers, serveware and empty dishes the day before. Keep food out of the setup until shortly before guests arrive, and add garnishes and fresh herbs just before serving.
How many serving spoons do I need?
Plan one serving utensil per dish, plus one spare for each dish that will be refilled often. Place the utensil on the same side as the dish handle so guests reach it easily.
Should the buffet go against a wall?
A wall placement makes it easier to control traffic and keeps the cords and warmers out of the way. If the table is freestanding, guests can line up on one side only, so make sure the table is long enough for the number of guests.
What is the best order for buffet food?
Most hosts start with plates, then cold sides, hot sides, mains, bread and sauces, and end with desserts. Keep dishes that guests take the most of near the front so the line does not stall.
How do I keep hot food hot during a long party?
Use a chafing dish, an electric warming tray or a slow cooker set to warm. Check the temperature with a food thermometer, and aim for 135°F or higher. Refresh dishes in the kitchen as needed.
How do I handle guests with food allergies?
Label every dish with its main ingredients and any common allergens, and place allergen-free dishes on a separate section of the table so there is no cross-contact. Ask guests about allergies ahead of time when you can.
Do I need a separate table for drinks?
For a large group, yes. A separate drink station keeps cups and bottles away from the food line and lets guests get beverages without blocking the buffet.
Conclusion
A good christmas buffet table setting balances flow, height and food safety, so guests can serve themselves quickly and enjoy the spread. Plan the layout first, order the food by how guests will move, and keep hot and cold items in their proper zones. With a clear map and a few finishing touches, your buffet will look festive and run smoothly from the first plate to the last dessert.
Related reading
- Wedding Table Setting for Buffet Dinner: 7 Steps for a Smooth Reception
- Traditional Christmas Table Setting Ideas: 6 Classic Layouts for Hosts
- Table Setting for a Buffet: 6 Best Place Cards and Warmers (2026)
- Table Setting Ideas for Christmas Dinner: 7 Easy Layouts for Hosts
- Simple Christmas Table Setting: 6 Easy Steps for Stress-Free Hosting
- Setting a Christmas Table: A Step-by-Step Guide for Hosts
- Setting Up a Thanksgiving Buffet Table: 4 Best Picks for Hosts (2026)
- Setting Dining Table for Christmas: A Step-by-Step Guide for Hosts
Ready to choose one?
About Miles Sinclair
Miles Sinclair is part of our editorial team and reviews and edits our holiday hosting guides, checking product details against manufacturer specifications and owner feedback.